| View previous topic :: View next topic |
| Author |
Message |
TheZeppelin


Joined: 01 Jun 2008
Posts: 290
Location: The Video Game Store, Canada
|
 Posted: Sun Aug 10, 2008 5:54 am Post subject: Posted: Sun Aug 10, 2008 5:54 am Post subject: |
 |
|
| Slagr wrote: | i love how everyone keeps saying "nice photoshop," even though this is like 10 mins in paint. just move half the pic over the other half til they line up and color.  |
lol  BTW How come the smilys are red not yellow BTW How come the smilys are red not yellow |
|
| Back to top |
|
 |
L0ydmarshall

Joined: 18 Jul 2008
Posts: 9
|
| Posted: Sun Aug 10, 2008 10:31 pm Post subject: |
|
|
| good luck, i know you can do it |
|
| Back to top |
|
|
Allanscotti

Joined: 30 Jan 2008
Posts: 44
|
| Posted: Tue Aug 12, 2008 11:55 pm Post subject: |
|
|
| TheZeppelin wrote: | | Slagr wrote: | | i love how everyone keeps saying "nice photoshop," even though this is like 10 mins in paint. just move half the pic over the other half til they line up and color. |
lol BTW How come the smilys are red not yellow |
They all went out and got sunburned. |
|
| Back to top |
|
|
Slagr


Joined: 11 Oct 2007
Posts: 989
Location: IL
|
| Posted: Thu Aug 14, 2008 4:56 am Post subject: |
|
|
construction starts tomorrow!
i did have one problem with disassembly, however. i can't remove the wires from the RO's battery pack without breaking the solder (which isn't that big a deal, i just don't have a soldering iron). it will be possible to do everything with it still connected, but it'll be a little more awkward. any tips?
_________________
|
|
| Back to top |
|
|
Noowm
Joined: 17 Jul 2008
Posts: 296
|
|
| Back to top |
|
|
IWillKickU


Joined: 06 Dec 2007
Posts: 2830
Location: In the Undertow
|
| Posted: Thu Aug 14, 2008 1:09 pm Post subject: |
|
|
| Yeah, you definately don't want to attempt this mod if you don't have a soldering iron. I've used solder on practically EVERY mod I've ever done. Get yourself a soldering iron! |
|
| Back to top |
|
|
Slagr
Joined: 11 Oct 2007
Posts: 989
Location: IL
|
| Posted: Thu Aug 14, 2008 6:27 pm Post subject: |
|
|
my uncle brought one. he seems to know what to do.
_________________
|
|
| Back to top |
|
|
Slagr
Joined: 11 Oct 2007
Posts: 989
Location: IL
|
| Posted: Fri Aug 15, 2008 12:54 am Post subject: |
|
|
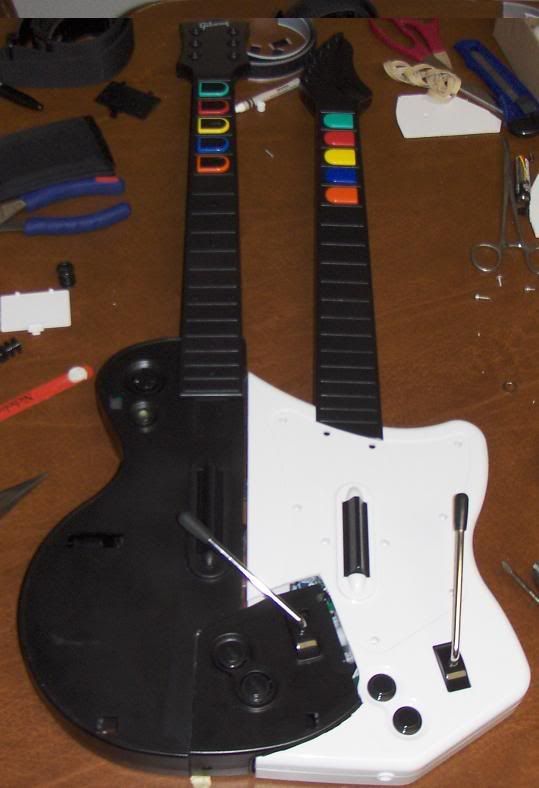
very good day 1, finished almost all the cutting.
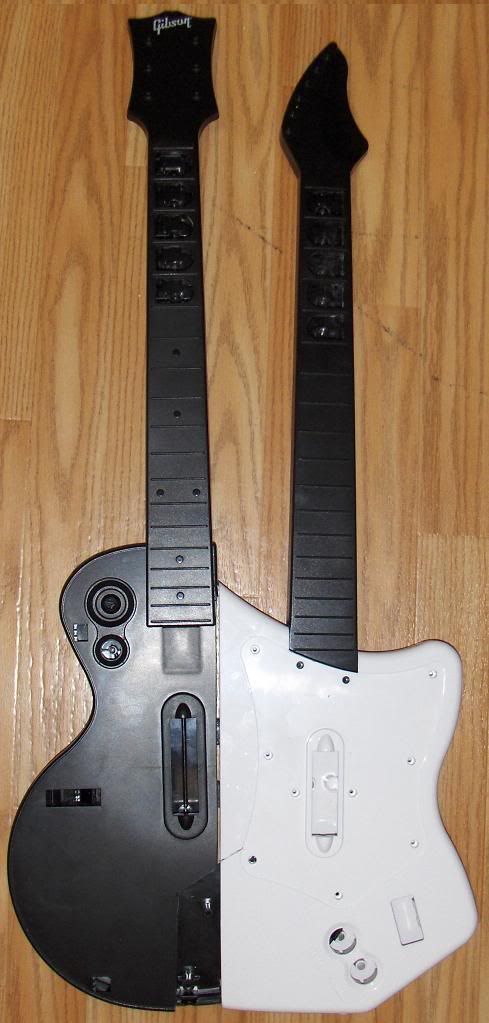
the necks aren't parallel, but i'm happy with it. it's not yet glued. you may have noticed how epic the cuts are; i used a utility knife (a buffer version of the x-acto) along a straight edge then flexed the halves until they broke on a perfect line.
The Halftar!!! (i almost wish i could keep it this way)
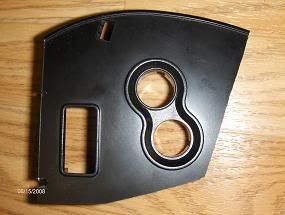
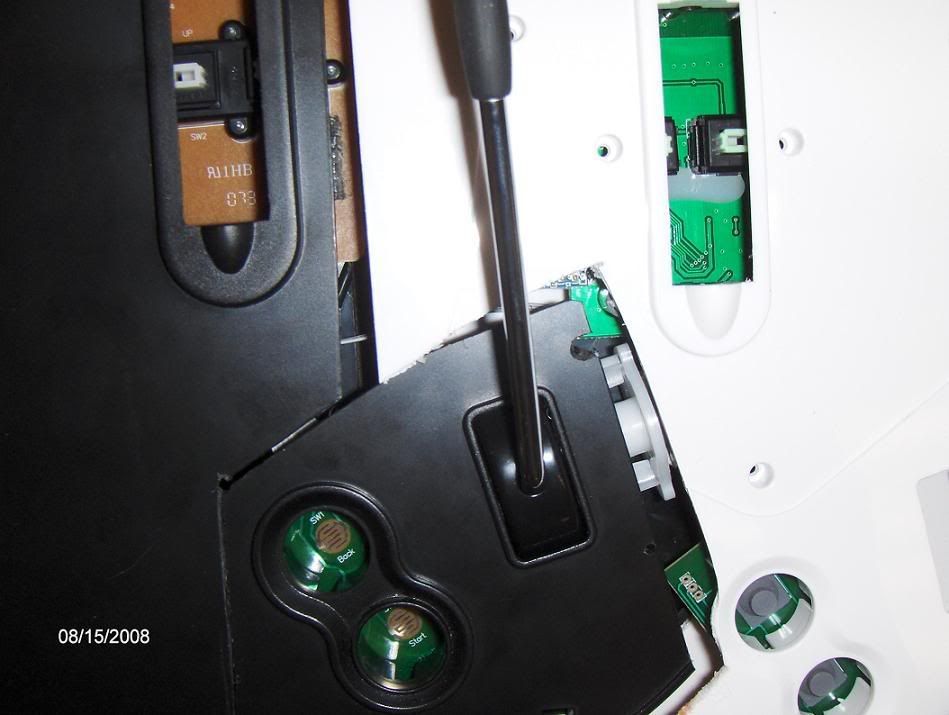
this will fit in that gap on the front. i still need to cut part of the RO for this.
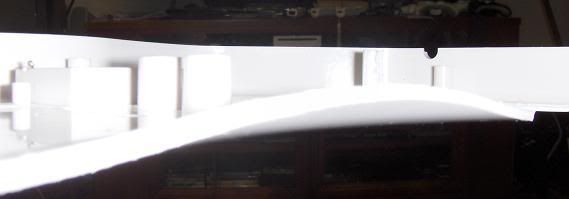
this curve in the RO is kind of a problem. i'm going to try setting an iron on it and seeing if the heat can melt it enough to bend it down.
edit: 
it worked.
op: another problem i have is making a hole for the headset. i'm going to try using the RO's strap nub hole (lol) for the sync button. the phone cable is unnecessary.
(i'll assume this double post is excused)
_________________
Last edited by Slagr on Sat Aug 16, 2008 6:21 am; edited 1 time in total |
|
| Back to top |
|
|
Noowm
Joined: 17 Jul 2008
Posts: 296
|
| Posted: Fri Aug 15, 2008 1:23 am Post subject: |
|
|
thats realy good for the first day and i kinda want to make a half guitar now lol
_________________
F**k the WARRANTY!!!
| BriGuy wrote: | | Most other mods that I do involve using a screwdriver and a soldering gun. I have an idea for a mod for this thing that only requires a hammer. |
ROFLMFAO |
|
| Back to top |
|
|
Slagr
Joined: 11 Oct 2007
Posts: 989
Location: IL
|
| Posted: Fri Aug 15, 2008 2:32 am Post subject: |
|
|
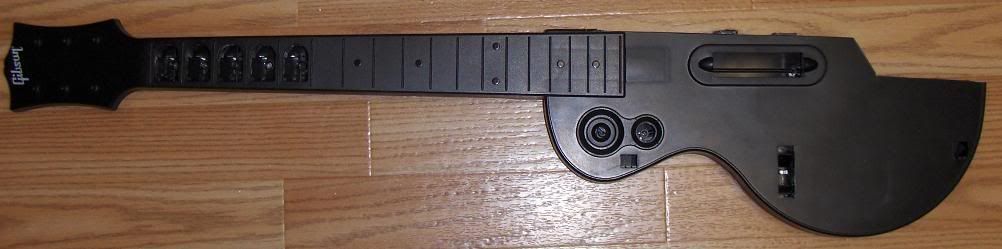
cutting is now done.
this is a problem. it appears i measure the top wrong, and now i need to patch these holes... this also proves the guts will fit.
_________________
|
|
| Back to top |
|
|
Noowm
Joined: 17 Jul 2008
Posts: 296
|
| Posted: Fri Aug 15, 2008 3:22 am Post subject: |
|
|
just glue it in there and then go back latter after everything is glued up and use bondo to fill in all of the gaps
_________________
F**k the WARRANTY!!!
| BriGuy wrote: | | Most other mods that I do involve using a screwdriver and a soldering gun. I have an idea for a mod for this thing that only requires a hammer. |
ROFLMFAO |
|
| Back to top |
|
|
born2bounce

Joined: 02 May 2008
Posts: 366
Location: SoCal
|
| Posted: Fri Aug 15, 2008 3:31 am Post subject: |
|
|
| You probably didn't mean to make the necks unparallel, but I kinda like it like that. Makes it look a little crazy! (Which it is) |
|
| Back to top |
|
|
Slagr
Joined: 11 Oct 2007
Posts: 989
Location: IL
|
| Posted: Fri Aug 15, 2008 4:09 am Post subject: |
|
|
i like the non-parallel necks too because it leaves more room for my fretting hand.
_________________
|
|
| Back to top |
|
|
MRCOOLGH

Joined: 15 Jun 2008
Posts: 7
|
| Posted: Fri Aug 15, 2008 6:04 pm Post subject: |
|
|
I have faith that you can finish this project. but I suggest you use some sand paper if you want to smoothen out the thickly curved back side of the SG guitar that way you can make the guitar look nicer. and also what bondo?
_________________
guitar hero rocks!
but I think rockand is cool too! |
|
| Back to top |
|
|
Slagr
Joined: 11 Oct 2007
Posts: 989
Location: IL
|
| Posted: Fri Aug 15, 2008 6:07 pm Post subject: |
|
|
if i used sand paper on the curve, it would be buffed out into oblivion. i need that part, i just need it flat.
edit: awaiting epoxy
_________________
|
|
| Back to top |
|
|
|


